 Skip to content
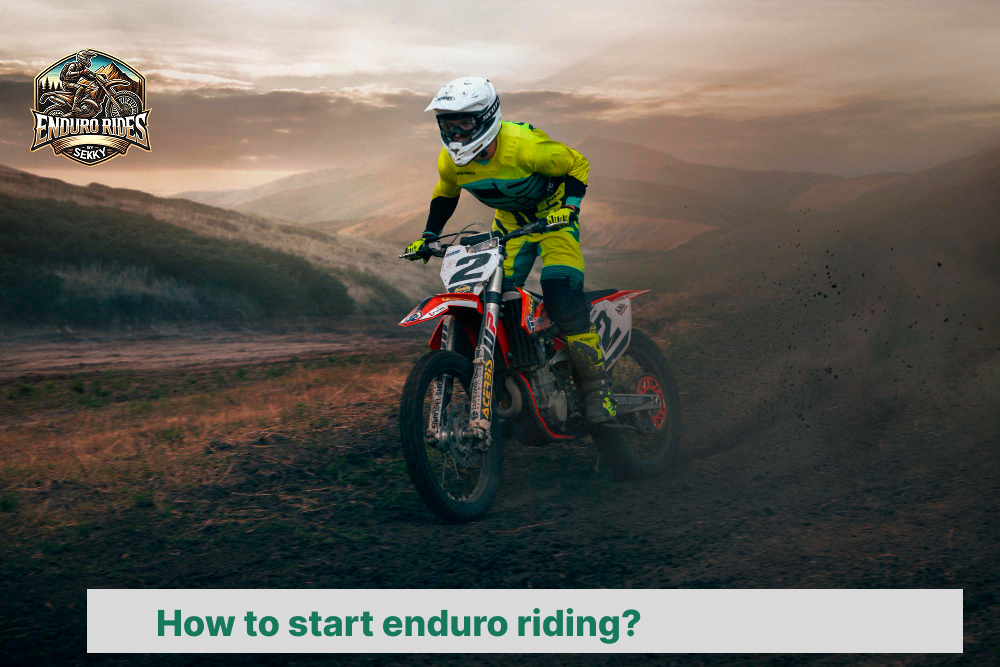
To start enduro riding, a beginner follows a structured learning sequence: learn the basics of motorcycle handling, wear the proper protective gear, choose an entry-level enduro bike, practice balance and throttle control on flat ground, train braking techniques on different surfaces, learn body positioning for uphill and downhill riding, practice cornering in dirt and loose terrain, develop clutch and throttle coordination for obstacles, ride on beginner-friendly trails, gradually progress to more technical terrains, join local enduro groups or riding schools, and maintain and service the bike regularly.
- Learn the basics of motorcycle handling
- Get the proper protective gear
- Choose an entry-level enduro bike
- Practice balance and throttle control on flat ground
- Train braking techniques on different surfaces
- Learn body positioning for uphill and downhill riding
- Practice cornering in dirt and loose terrain
- Develop clutch and throttle coordination for obstacles
- Ride on beginner-friendly trails
- Which motorcycle is best for beginners in enduro riding?
- How much does it cost to start enduro riding?
- What protective equipment is essential for enduro riding?
- How do I find local trails for enduro riding?
Enduro riding begins with learning the basics of motorcycle handling. The rider gains control through slow-speed maneuvers, clutch release drills, and controlled acceleration. Handling drills improve confidence and reduce errors in off-road conditions. Protective gear follows as the next step. Helmets, boots, gloves, and body armor prevent injuries during falls or collisions. Protective equipment includes examples such as full-face helmets, reinforced boots, and chest protectors.
The rider then selects an entry-level enduro bike. Lightweight models with manageable power help reduce fatigue and improve control. Entry-level bikes include examples such as Yamaha WR250F, Honda CRF250F, and KTM EXC-F 250. Practice continues on flat ground, focusing on balance and throttle control. Balance exercises include slow figure-eights and one-foot stand drills. Throttle drills improve modulation and traction response. Braking training follows on different surfaces, such as gravel, mud, and sand, to build adaptive reaction.
Body positioning is critical in uphill and downhill riding. Standing forward improves uphill grip, while leaning back stabilizes downhill descents. Cornering practice takes place in dirt and loose terrain, where the rider learns inside foot placement and counterweighting. Obstacle riding requires clutch and throttle coordination. Obstacles include logs, rocks, and shallow streams. Coordination drills improve precision and reduce stalling. Beginner-friendly trails provide the first real riding environment. Progression occurs when the rider gains confidence to move into technical terrains.
Progression continues by joining local enduro groups or riding schools. Groups provide shared knowledge, such as trail recommendations, while schools provide structured instruction. Maintenance of the bike remains constant throughout practice. Regular service includes checking tire pressure, chain tension, and brake pad wear. Maintenance examples include oil changes every 20 riding hours and filter replacements after dusty rides. Progress in enduro riding is consistent if practice frequency is high and progression steps follow this sequence.
Learn the basics of motorcycle handling
Learning the basics of motorcycle handling for enduro riding begins with balance and throttle control. Balance is maintained by keeping body weight centered over the pegs. Throttle control improves stability on uneven surfaces. Clutch control reduces wheel spin in dirt conditions. Braking technique adapts depending on terrain type, such as gravel or mud.
Motorcycle handling for enduro riding includes standing posture and steering precision. Standing posture increases control during acceleration. Steering precision improves line choice on trails. Riders use counterbalance in turns to prevent sliding. Braking systems consist of front brake and rear brake, with the front brake providing 70% of stopping power. Examples of terrain include sand, rocks, and forest paths.
Enduro training improves endurance and muscle coordination. Riders practice slow-speed maneuvers to develop clutch control. Riders improve corner entry by combining throttle and rear brake. Protective gear increases safety during training sessions. Examples of protective gear are helmet, boots, gloves, and chest protector. A rider improves skills faster if training is repeated on consistent tracks.
Get the proper protective gear
The first step in starting enduro riding is to get proper protective gear. Protective gear includes a helmet, boots, gloves, goggles, chest protector, knee guards, and riding suit. Every item protects the rider from injuries in falls, crashes, or contact with terrain.
A helmet is the core item in enduro riding. The helmet protects the head from concussions and fractures. Helmets for enduro are full-face types with chin protection. Goggles are used with helmets to protect eyes from mud, dust, and branches. Goggles often come with tear-off films or roll-off systems in muddy racing conditions.
Boots are another critical item in protective gear. Boots protect ankles, shins, and feet from impacts, twisting, and burns from the exhaust. Enduro boots are rigid and reinforced with steel or plastic. Gloves protect hands from blisters, cuts, and impacts. Gloves for enduro riding are padded with knuckle protection.
A chest protector defends the torso against stones, branches, and collisions. Chest protectors are made from high-density plastics or composite materials. Knee guards or knee braces protect ligaments and joints from twisting. Riders often wear knee guards under riding pants. A riding suit provides abrasion resistance, ventilation, and flexibility. Riding suits include pants and jerseys made from nylon, polyester, or Kevlar blends.
Protective gear items include helmets, boots, and gloves. Helmets such as Airoh Aviator and Shoei VFX protect against head trauma. Boots such as Alpinestars Tech 10 or Gaerne SG-12 protect against ankle injuries. Gloves such as Fox Bomber or Thor Rebound protect against impacts.
Protective gear improves safety and performance. Safety improves by reducing injury risk in crashes. Performance improves by giving stability, grip, and comfort. The protective gear cost varies by brand and material. Costs can be reduced if items are bought second-hand, on condition they are not damaged.
Choose an entry-level enduro bike
The best entry-level enduro bike for starting enduro riding is the Yamaha WR250F. The Yamaha WR250F has a 250cc four-stroke engine, an electric start system, and suspension tuned for both trail and competitive use. The Yamaha WR250F is light in weight and provides stable handling, which makes it ideal for beginners entering enduro riding.
The Yamaha WR250F uses a liquid-cooled single-cylinder engine that produces smooth power delivery. Smooth power delivery improves control for new riders who are learning throttle management. The Yamaha WR250F has KYB suspension with 12 inches of travel, which absorbs impacts on rough terrain such as roots, rocks, and ruts. KYB suspension stability improves confidence in off-road riding if the rider trains on uneven surfaces.
The Yamaha WR250F weighs 254 lbs, which makes it lighter compared to larger displacement bikes such as KTM 450 EXC-F or Husqvarna FE 501. A lighter weight reduces fatigue during long rides and makes picking up the bike easier in training situations. Entry-level riders benefit from features like electric start, six-speed gearbox, and engine mapping controls. These features increase rider adaptability, especially if training environments vary between technical trails, forest tracks, and open dirt sections.
Practice balance and throttle control on flat ground
Practicing balance and throttle control on flat ground is the first step in starting enduro riding. Flat ground provides a stable surface, so the rider can focus on weight distribution and throttle input without external variables. Practicing balance teaches body positioning, while practicing throttle control teaches power delivery. Both skills form the foundation of safe enduro riding if they are mastered early.
Balance practice on flat ground involves standing on the pegs, shifting weight between the front and rear, and maintaining stability with minimal steering. Flat ground practice improves coordination between hands, legs, and body. Examples of balance drills are riding slowly in a straight line, pausing without putting feet down, or turning in small circles. Each drill improves reaction speed and stability under controlled conditions.
Throttle control on flat ground involves applying smooth acceleration, reducing wrist jerks, and matching power with traction. Controlled throttle input prevents wheel spin, which is critical on dirt, gravel, or sand. Flat ground training allows repetition of throttle drills without risk from uneven terrain. Examples of throttle drills are starting smoothly from idle, rolling on power in second gear, or modulating throttle during slow turns. Practicing throttle control in this environment improves safety and prepares the rider for inclines, mud, and obstacles if the terrain changes.
Train braking techniques on different surfaces
Train braking techniques on different surfaces by practicing controlled deceleration on dirt, gravel, mud, sand, and asphalt. Apply front brake and rear brake progressively, adjust braking force based on traction, and maintain body balance through correct weight distribution.
On dirt surfaces, braking techniques demand progressive pressure on the front brake while the rear brake stabilizes the motorcycle. Dirt surfaces such as loose soil, packed trails, and rocky paths generate lower traction values, so the rider applies less force on the front brake and more modulation on the rear brake. Examples of dirt surfaces are forest trails, gravel roads, and stony climbs.
On mud surfaces, braking techniques rely on rear brake dominance because mud surfaces create sliding conditions. The rider uses the rear brake to maintain line stability and shifts body weight backward to prevent front wheel locking. Mud surfaces include swamp trails, rain-soaked fields, and clay sections. On sand surfaces, braking techniques require firm weight over the rear wheel with steady pressure on both brakes. Sand surfaces such as dunes, riverbanks, and deep beach sand absorb energy, so longer braking distance is expected if braking begins late.
On gravel surfaces, braking techniques emphasize smooth application of both brakes with increased distance. Gravel surfaces such as loose stone roads, quarry paths, and alpine tracks generate rolling movement under the wheels, so precise modulation prevents skidding. On asphalt surfaces, braking techniques prioritize strong front brake pressure with controlled rear brake input. Asphalt surfaces such as paved connections between trails, parking areas, and road transfers offer high traction, but aggressive input destabilizes the rear wheel if weight transfer is not managed.
Learn body positioning for uphill and downhill riding
Body positioning for uphill riding means shifting weight forward on the seat and leaning chest toward the handlebars. This positioning increases front wheel traction and stabilizes climbing balance. Downhill riding requires shifting weight backward with hips over the rear wheel and keeping arms loose for shock absorption. These two techniques form the exact starting foundation for enduro riding.
Forward weight in uphill riding keeps the front wheel grounded on steep inclines such as rocky trails or muddy climbs. Riders improve traction by pressing knees against the tank or frame and keeping elbows high for steering control. Examples of surfaces where this positioning improves grip are loose gravel, wet roots, and sandy inclines. Consistency in applying forward body positioning builds confidence in steep sections if terrain becomes unstable.
Rearward weight in downhill riding prevents over-the-bar ejection during descents such as sharp drops, stair-step rocks, or loose scree slopes. Riders stabilize by lowering heels, bending knees, and extending arms for better suspension response. Examples of obstacles requiring this technique are downhill switchbacks, erosion ruts, and steep dirt chutes. This rearward body positioning improves braking efficiency and stability if speed increases rapidly.
Practice cornering in dirt and loose terrain
Practicing cornering in dirt and loose terrain is the first skill to train when starting enduro riding. The rider improves control by keeping weight forward, pressing knees against the tank, and applying steady throttle through the curve. The motorcycle maintains balance through momentum and line choice if the rider looks ahead and avoids sudden braking.
Enduro riding requires repeated training in loose terrain such as gravel, sand, or mud. Each surface type creates different traction levels, for example gravel shifts under the tire, sand absorbs speed, and mud reduces grip. Practicing cornering on these terrains develops muscle memory, improves reflexes, and strengthens balance. Enduro riders test body position, throttle precision, and braking points during cornering repetitions.
Training cornering must progress from slow controlled turns to faster continuous laps. Riders practice figure-eight drills, tight switchbacks, and wide radius corners. These drills teach balance in unstable conditions and improve traction management. Training gains are consistent if the rider increases speed gradually after mastering control at low speed.
Develop clutch and throttle coordination for obstacles
Clutch and throttle coordination for obstacles in enduro riding is achieved by synchronizing lever release with throttle opening. The rider controls torque delivery through throttle while controlling wheel traction through clutch. This synchronization prevents stalling on steep climbs and prevents wheelspin on slippery roots.
Clutch and throttle coordination in enduro riding relies on controlled increments of input. The clutch regulates engine engagement, while the throttle adjusts power intensity. Obstacles such as logs, rocks, and roots require timing of lever release with throttle roll-on. Examples of obstacles include wet logs, loose rocks, and tree roots. Riders press clutch slightly before the front wheel contacts the obstacle and open throttle gradually when the rear wheel climbs over.
Enduro riding skill development uses repetition of clutch and throttle drills. Riders practice slow maneuvers with cones, ramps, and step-ups to improve balance. Repetition of drills strengthens muscle memory and improves reaction speed. Riders maintain throttle control at steady rpm and modulate clutch to prevent engine stall. The same coordination improves performance on steep inclines, rocky paths, and technical sections if practiced consistently.
Ride on beginner-friendly trails
Beginner-friendly trails are the correct entry point into enduro riding. A beginner-friendly trail is defined by lower gradient, smoother surface, and predictable corners. Green and blue rated trails in bike parks are typical examples, such as flow trails, forest service roads, or short loop tracks. These trails provide the base conditions for learning braking, cornering, and body positioning. Riding these trails improves skill progression if the gradient remains below 10% and the terrain avoids technical obstacles.
Beginner-friendly trails create consistent practice environments. Consistency in gradient and surface allows repetition of braking drills, cornering drills, and line choice drills. Locations such as pump tracks, skill parks, and family cycling routes are examples of controlled terrains. These terrains reduce physical risk, minimize equipment stress, and reinforce confidence. Riders can practice controlled descents and rolling features if the speed remains moderate and the terrain stays predictable.
Beginner-friendly trails support the transition into more advanced enduro trails. Smooth trails strengthen fundamental balance and bike control, which directly transfer to rocky trails, rooty trails, and switchback trails. Specific examples of progressions include moving from a flow trail with berms to a red trail with roots, or from a fire road climb to a singletrack climb. Progression is effective when riders maintain correct posture and adapt to increased technical features. A rider improves gradually if the progression includes incremental difficulty and consistent trail repetition.
Which motorcycle is best for beginners in enduro riding?
The best motorcycle for beginners in enduro riding is the Yamaha WR250F. Yamaha WR250F uses a 250cc four-stroke engine, has a lightweight chassis, and provides balanced suspension. This combination makes Yamaha WR250F stable, predictable, and easy to handle for entry-level riders.
Honda CRF250F is another beginner-friendly motorcycle. Honda CRF250F uses a 250cc air-cooled four-stroke engine, offers electric start, and has low maintenance requirements. These attributes make Honda CRF250F practical, accessible, and safe for riders entering enduro riding.
Kawasaki KLX230 is equally recommended for beginners. Kawasaki KLX230 features a 233cc four-stroke engine, simple fuel injection system, and moderate seat height. These features make Kawasaki KLX230 versatile, forgiving, and suitable for first-time enduro riders. Examples of other entry-level enduro motorcycles include Suzuki DR200S, KTM 200 XC-W, and Beta Xtrainer.
How much does it cost to start enduro riding?
The cost to start enduro riding is between 3,000 € and 8,000 € depending on equipment, motorcycle, and protective gear.
A used enduro motorcycle costs from 2,500 € to 6,000 € depending on brand and model. Brands such as KTM, Yamaha, and Honda are common examples. A new enduro motorcycle costs from 7,000 € to 12,000 €. Protective gear costs from 500 € to 1,500 € depending on helmets, boots, and body armor. Basic gear includes helmet, boots, gloves, and body protector.
Registration, insurance, and maintenance costs range from 500 € to 1,000 € per year. Registration fees cover legal documents. Insurance covers accident liability. Maintenance includes oil, filters, and tires. Tires cost from 70 € to 120 € each. Oil and filter changes cost around 50 € per service.
Rider training courses cost from 200 € to 500 €. Training courses improve skills and safety. Local clubs offer memberships from 50 € to 150 € per year. Membership fees cover events, training, and tracks. Events such as regional races require entry fees from 30 € to 100 € per race.
What protective equipment is essential for enduro riding?
Essential Protective Equipment for Enduro Riding
1. Helmet
A full-face helmet is essential for enduro riding. It protects the skull, face, jaw, and brain from trauma in case of falls or collisions. Helmets for enduro riding often include a visor and extended chin guard. Example helmets are motocross helmets and dual-sport helmets.
2. Goggles
Protective goggles prevent dust, mud, and stones from entering the eyes. Goggles are designed with anti-fog lenses and tear-off films. Example goggles are Oakley Airbrake and 100% Armega.
3. Body Armor
Body armor protects the chest, back, and shoulders from impacts. It is made from hard plastic plates and impact-absorbing foam. Example armors are Leatt Chest Protector and Alpinestars A-10.
4. Gloves
Gloves protect the hands from abrasions and improve grip on handlebars. They are reinforced with knuckle guards and padded palms. Example gloves are Fox Dirtpaw and Troy Lee Designs GP.
5. Boots
Enduro boots protect the ankles, shins, and feet. They are reinforced with steel toe caps and ankle bracing systems. Example boots are Sidi Crossfire and Gaerne SG-12.
6. Knee Braces or Guards
Knee protection prevents ligament injuries and bone fractures. Knee braces stabilize the joint while knee guards absorb external shocks. Example braces are Pod K8 and Leatt C-Frame.
7. Elbow Guards
Elbow guards shield the joints from abrasions and fractures during falls. Example guards are EVS Epic and Fox Titan.
8. Neck Brace
A neck brace reduces the risk of cervical spine injuries. It prevents extreme head movement in crashes. Example braces are Leatt GPX and Atlas Air.
How do I find local trails for enduro riding?
Enduro trails in Bosnia are concentrated in mountain regions such as Jahorina, Vlašić, Prenj, and Igman. Riders find marked routes that pass through forest paths, rocky ascents, and river crossings. Local clubs in Sarajevo, Banja Luka, and Mostar organize events where maps of trails are distributed. Examples of trails include Jahorina forest loops, Vlašić gravel climbs, and Prenj rocky passes. Riders locate trails through local moto clubs, GPS track files, and organized enduro tours. Maps are often shared in rider forums, event pages, and navigation apps.
Enduro routes in Jahorina contain steep forest sections and gravel fire roads. Vlašić trails contain alpine meadows and long dirt climbs. Prenj trails contain rocky single-tracks and technical passages. Igman trails contain wooded slopes and open plateaus. Trails in Bosnia often connect villages such as Pale, Travnik, and Konjic. Riders use GPX tracks provided by event organizers. Clubs publish routes during events such as Hard Enduro Sarajevo or Banja Luka Rally. Events gather riders from Bosnia, Croatia, and Serbia.
Where I can ride enduro in Central Bosnia?
You can ride enduro in Central Bosnia in Uskoplje. Uskoplje is a known location in Gornji Vakuf-Uskoplje municipality that has organized enduro trails. The area has mountain terrain with forest paths, gravel roads, and steep climbs, which makes it suitable for enduro riding. Riders use local trails that connect villages and ridges.
The Uskoplje terrain has mixed conditions such as rocky sections, river crossings, and open slopes. These conditions allow technical riding and endurance training. Riders from Bosnia and neighboring countries come to Uskoplje for enduro events. Examples of these events are annual enduro gatherings where dozens of riders participate.
Enduro in Uskoplje is supported by local clubs. Clubs maintain routes and prepare markings for events. Trails cover surrounding hills such as Radovina and Raduša. Raduša mountain offers long-distance tracks with forest density and altitude differences over 1,500 meters. This creates conditions for advanced riders and beginners if they select easier segments.
Is Enduro Sekky provide Enduro Bosnien Tours?
Yes. Enduro Sekky provides Enduro Bosnien tours in Uskoplje.
The tours in Uskoplje are organized for riders who want guided access to mountain trails. Enduro Sekky prepares routes that pass through forests, rivers, and rocky climbs around Gornji Vakuf-Uskoplje. These tours often include local trails across Radovina and Raduša mountains. Riders join groups where the difficulty of terrain is adapted to skill level.
The service in Uskoplje covers organized days of riding, technical guidance, and support. Groups can ride on varied terrain such as gravel roads, forest paths, and mountain ridges. Examples of tours include weekend events where foreign and domestic riders participate. This provides structured conditions for safe and demanding enduro riding.
